
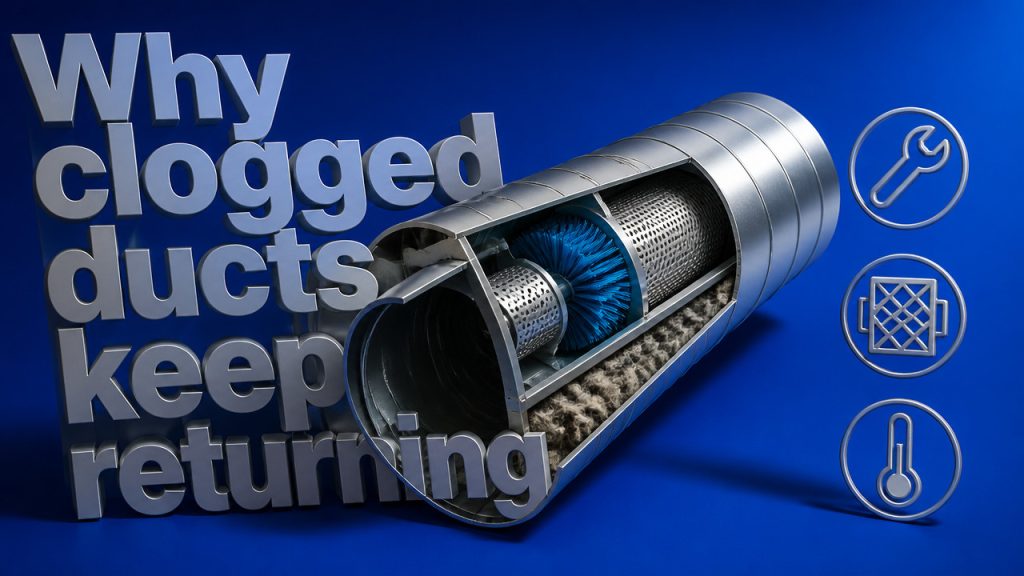
Central Texas homeowners face a critical airflow challenge when ducts accumulate debris, restricting HVAC efficiency by up to 40% [2026 NADCA Study]. A clogged duct manifests through weak airflow, increased energy bills, and persistent dust accumulation throughout your living spaces. This guide delivers field-tested protocols from Austin’s HVAC specialists, combining DIY assessment techniques with professional-grade interventions that restore optimal air circulation. Whether you’re battling post-construction dust or years of gradual buildup, understanding the anatomy of duct obstructions empowers you to reclaim your home’s air quality and system performance.
Quick Answer: The Three-Stage Clog Elimination Protocol
Learning how to get rid of a clogged duct comes down to a systematic approach that progresses from simple diagnostics to deep cleaning interventions. Most blockages resolve through a structured three-stage process that determines whether you can handle the issue yourself or need to call in the cavalry. Homeowners in Austin should note that our unique climate conditions think cedar fever season and caliche dust make regular assessment essential.
NADCA (National Air Duct Cleaners Association) clearance standards suggest maintaining at least 0.1 inches of water column static pressure across residential systems. When pressure drops below this threshold, your system struggles to push conditioned air past obstructions. This protocol helps you identify where your system stands and what actions restore proper ventilation system clearing.
- Stage 1: Visual Inspection and Surface Cleaning
- Remove and clean register covers with warm soapy water
- Use a flashlight to inspect visible duct interiors for debris buildup
- Vacuum accessible areas within 3-4 feet of each register opening
- Stage 2: Agitation and Deep Vacuuming
- Employ rotary brushes or flexible rods to dislodge stuck debris
- Utilize high-suction shop vacuums with HEPA filtration attachments
- Clear obstructions in straight duct runs accessible from multiple points
- Stage 3: Professional-Grade Negative Pressure Cleaning
- Deploy truck-mounted or large portable vacuum collection units
- Apply compressed air whips and brushes throughout entire ductwork
- Conduct post-cleaning verification with airflow measurement tools
For homeowners seeking guaranteed results without the equipment investment, professional air duct cleaning services provide Stage 3 interventions that surpass what typical residential equipment can accomplish.
Identifying Clogged Duct Symptoms in Austin Homes [2026 Analysis]
Recognizing the early warning signs of restricted airflow saves homeowners significant money on energy costs and prevents unnecessary HVAC strain. In Central Texas, where air conditioning runs practically year-round, a clogged duct accelerates system wear and compromises indoor comfort. You might notice certain rooms never reach the thermostat setting, or that dust seems to settle on furniture moments after cleaning.
Beyond the obvious dust accumulation, listen to your system. If you hear whistling sounds at registers or rattling within the ductwork walls, these audio clues often indicate partial obstructions forcing air through narrower passages. The signs that your ducts need immediate attention often start subtly before escalating into major efficiency losses.
Austin’s Hill Country location contributes specific challenges. Construction boom activity in areas like Leander and Liberty Hill increases airborne particulate matter, while our notorious cedar pollen season (December through February) adds organic debris to duct interiors. Combined with standard household dust from dead skin cells to pet dander these regional factors compound blockage formation.
| Performance Metric | Normal Duct System | Clogged Duct System |
|---|---|---|
| Air Velocity at Register | 400-600 FPM | 150-300 FPM |
| Static Pressure | 0.05-0.1 in. w.c. | 0.15-0.25 in. w.c. |
| Energy Consumption | Baseline usage | 20-40% increase |
| Temperature Differential | 15-20°F at supply | 8-12°F at supply |
| Dust Cycle Frequency | Every 7-10 days | Every 2-3 days |
According to the 2026 NADCA Study referenced in our opening, blocked air duct removal efforts yield an average energy savings of 21% for homes that completed full duct cleaning versus those that neglected maintenance for five or more years.
Homeowners should also monitor for unexplained increases in allergy symptoms. When duct blockage solutions get delayed, recirculating debris triggers respiratory irritation, particularly concerning for families with babies or elderly members.
Essential Tools for Homeowner-Level Duct Inspection
Before attempting any duct blockage removal, gather diagnostic equipment that reveals what’s happening inside your ventilation system. The total investment for quality homeowner-grade inspection tools stays under $100, making this a worthwhile preliminary step before deciding on professional intervention. Safety comes first always turn off your HVAC system at the thermostat and breaker before removing any register covers.
You’ll want tools that illuminate, extend, and measure. A good flashlight gets you 80% of the way, but adding a flexible inspection mirror and a basic digital manometer provides data rather than guesswork. These effective duct cleaning techniques start with proper assessment tools.
- High-Lumen LED Flashlight ($15-25): Minimum 500 lumens with adjustable focus beam for illuminating dark duct interiors
- Flexible Inspection Mirror ($10-18): Extendable mirror with 24-inch reach and angled head for seeing around corners
- Register Cover Tool ($8-12): Flathead screwdriver or dedicated grille removal tool prevents paint damage during extraction
- Digital Thermometer with Probe ($20-35): Measures temperature differential between supply and return air
- Anemometer ($25-45): Handheld wind speed meter records feet per minute (FPM) airflow at each register
- Shop Vacuum with HEPA Filter ($40-90): Minimum 4-gallon capacity with HEPA filtration captures fine particles without recirculating them
- Flexible Dryer Vent Brush ($15-25): 4-foot extendable bristle brush reaches past initial bends in rectangular and round ductwork
- Digital Camera or Smartphone ($0): Take photos of debris accumulation for comparison documentation
Register cover removal requires patience. Many Austin homes feature painted-over grilles where previous contractors skipped proper priming. Run a utility knife blade around the perimeter to score the paint seal before attempting removal. Forcing a stuck register often cracks the surrounding drywall or bends the grille beyond repair.
The DIY Clog Clearing Method: Step-by-Step Execution
Clearing accessible obstructions from your ductwork follows a logical sequence that maximizes debris removal while protecting your HVAC equipment. This method addresses blockages within 4-6 feet of register openings areas where homeowner tools can reach effectively. Deep interior clogs require professional equipment, but substantial improvements come from thorough work at these accessible points.
Safety cannot be overstated. Before touching any ductwork, verify your HVAC system has completely powered down. Turn the thermostat to “OFF,” then locate your electrical breaker panel and flip the HVAC circuit breaker to the off position. This prevents the system from cycling on during your work and protects against accidental contact with blower fan components.
- Preparation Phase: Place drop cloths beneath each register you’ll clean. Duct debris contains dust mites, construction particles, and potential allergens you don’t want this spreading across flooring.
- Register Removal: Unscrew each grille cover carefully, placing screws in a small container. Wash grilles in warm soapy water and let dry completely before reinstallation.
- Initial Vacuuming: Using your shop vacuum with hose extension, suck loose debris from the register boot opening. Work slowly to avoid pushing debris deeper.
- Agitation Process: Insert your flexible vent brush into the duct opening. Rotate the brush while pulling back to dislodge stuck-on debris. Repeat this motion 4-5 times per register.
- Deep Vacuuming: After agitation vacuum again, this time holding the hose static at full extension for 30 seconds. This captures loosened particles settling from brush work.
- Filter Check: Replace your HVAC filter during this process. A clogged filter negates your cleaning efforts and restricts airflow from the source.
- Duct Interior Wipe: For visible surfaces near openings, wipe with a damp microfiber cloth. Never use chemical cleaners inside ductwork this can damage components and introduce harmful VOCs.
- System Restoration: Reinstall clean register covers, restore power at the breaker, and turn thermostat to “ON” (fan only) for 10 minutes to flush residual particles before switching to cooling mode.
This DIY approach handles thorough residential duct cleaning techniques for accessible areas. However, deep blockages located beyond your tool reach, or obstructions in flex duct systems, require equipment most homeowners don’t possess.
When Obstructions Require Professional Intervention
Not every clogged duct responds to homeowner efforts. Certain scenarios demand specialized equipment, technical expertise, or safety certifications that exceed DIY capability. Recognizing these boundaries protects your system from inadvertent damage and ensures complete air passage restoration without creating secondary problems.
Mold contamination tops this list. If your inspection reveals black, green, or white fuzzy growth inside ductwork, stop immediately. EPA protocols classify HVAC mold remediation as requiring containment barriers, negative air machines, and antimicrobial treatments that homeowners cannot safely execute. Attempting mold removal without proper containment spreads spores throughout your home, creating widespread contamination.
- Mold or Biological Growth: Requires EPA-compliant containment, negative pressure equipment, and antimicrobial application by certified technicians to prevent cross-contamination.
- Deep Interior Blockages: Obstructions beyond 6 feet from register openings demand specialized agitation tools and negative pressure collection equipment with 3,000+ CFM capacity.
- Flex Duct Damage: Older flexible ductwork develops interior liner tears that catch debris. Aggressive DIY cleaning can worsen tears, requiring full duct replacement.
- Construction Debris: Post-renovation dust contains silica, drywall compounds, and potentially hazardous materials requiring industrial-grade HEPA filtration for safe removal.
- Pest Infestation Evidence: Droppings, nesting materials, or deceased pests in ductwork require proper biohazard protocols and often indicate entry points needing professional sealing.
The Environmental Protection Agency states that biological contaminants in ductwork can cause allergic reactions, respiratory issues, and other health problems, particularly in individuals with pre-existing conditions, young children, and elderly adults.
A comprehensive air duct cleaning approach from certified professionals addresses these scenarios with appropriate equipment and safety protocols, giving you documented results backed by service guarantees.
Advanced Clearing: Negative Pressure and Agitation Systems
Professional HVAC clog elimination employs equipment specifically designed for ventilation system clearing at a scale residential tools cannot match. Understanding these technologies helps homeowners appreciate why certain blockages require professional intervention and what to expect when hiring specialists.
The cornerstone of professional cleaning is negative pressure collection. Large vacuum units either truck-mounted or portable create powerful suction throughout your entire ductwork simultaneously. Rather than pulling debris section by section, negative pressure systems maintain constant airflow toward collection points, capturing dislodged particles before they escape into living spaces.
| Equipment Type | CFM Rating | Effectiveness Rating | Best Application |
|---|---|---|---|
| Shop Vacuum (Homeowner) | 150-200 CFM | Low-Moderate | Surface debris near registers |
| Portable HEPA Vacuum | 500-800 CFM | Moderate | Single-room systems |
| Portable Negative Air Machine | 2,000-3,000 CFM | High | Standard residential whole-home |
| Truck-Mounted Collection Unit | 10,000-15,000 CFM | Very High | Large homes, severe blockages |
Agitation devices work in concert with negative pressure. Air whips flexible tubes that snake through ductwork use compressed air pulses to knock debris loose from duct walls. Rotary brushes spin at varying speeds to scrub interior surfaces. Both methods require precise technique. Too aggressive, and you damage duct liners or connections; too gentle, and debris remains stuck.
Professional deep cleaning methods for healthier living combine these technologies in sequences matched to your specific ductwork configuration and contamination level.
Post-Clearing Verification and Airflow Testing
Completing ductwork debris removal leaves one critical step: verification. Without measuring improvements, you cannot confirm the blockage truly cleared. Simple tests using household items provide baseline data, while anemometer readings document actual airflow restoration.
The tissue paper test offers instant visual feedback. Hold a single-ply tissue paper above each register with your HVAC fan running on high speed. On a properly functioning system, the tissue should “stick” to the register face from suction pressure. Registers with weak or no adhesion indicate remaining restrictions or leaking duct connections.
For numerical documentation, use your anemometer to measure feet per minute (FPM) airflow at each register opening. Standard residential systems should deliver 400-600 FPM at supply registers. Numbers below 300 FPM suggest remaining partial blockages or system design issues requiring further investigation.
Take measurements from every register in your home and record them. This baseline helps identify future problems if airflow drops 20% at your next seasonal check, you’ll have concrete data showing the decline rather than guessing from comfort complaints.
Understanding the benefits of maintaining clean ducts includes establishing verification routines that catch gradual airflow restrictions before they become full blockages.
Key Takeaways
Restoring proper airflow through your home’s ventilation system requires recognizing symptoms early, applying appropriate clearing methods, and knowing when professional intervention becomes necessary. Austin homeowners face specific regional challenges from cedar pollen to construction dust that accelerate duct contamination beyond national averages.
- Three-Stage Protocol: Visual inspection leads to DIY agitation, progressing to professional negative pressure cleaning for deep blockages beyond homeowner reach.
- Symptom Recognition: Weak airflow, energy bill spikes, and persistent dust accumulation indicate restricted airflow requiring investigation.
- DIY Boundaries: Homeowner methods effectively address accessible debris within 4-6 feet of registers; deeper blockages require professional equipment.
- Professional Triggers: Mold growth, pest evidence, construction debris, and flex duct damage demand certified intervention for safety and effectiveness.
- Seasonal Maintenance: Austin homeowners should inspect ductwork quarterly particularly after cedar season (February) and before peak summer cooling demand (May).
- Verification Matters: Always measure airflow improvements with tissue tests or anemometer readings to confirm successful clog elimination.
Establishing these protocols and pursuing professional indoor air quality improvements when needed keeps Central Texas homes comfortable and healthy throughout our demanding cooling season.
FAQ
How do I know if my duct is clogged or if my AC unit is failing?
Check airflow consistency across all registers first. If some rooms have strong airflow while others feel weak, your problem is duct-related rather than compressor-related. When all registers show equally weak airflow combined with warm air output, the issue often traces to AC component failure. A warning signs your air ducts need attention checklist helps isolate duct problems from equipment failures through systematic comparison testing.
Can cedar pollen really block my air ducts?
Yes, Austin’s cedar season creates legitimate duct accumulation. From December through February, mountain juniper releases massive pollen quantities that infiltrate homes through fresh air intakes and open windows. Over multiple seasons without cleaning, this organic matter mats together with existing dust, forming partial blockages that restrict airflow. Cedar debris also serves as a nutrient source for mold growth when combined with humidity, compounding contamination issues.
How often should Austin homeowners clean their air ducts?
Every 3-5 years for most homes, more frequently under specific conditions. NADCA standards suggest this baseline timeline, but Austin’s high pollen counts, construction activity, and caliche dust often accelerate accumulation. Homes with pets, allergy sufferers, or recent renovations benefit from 2-3 year intervals. Monitoring filter conditions between cleanings provides useful indicators if filters clog within 30 days post-replacement, your ductwork likely needs attention sooner than average.
Will cleaning my ducts lower my energy bills?
Yes, measurable savings appear after clearing significant blockages. The 2026 NADCA Study cited earlier shows 21% average energy reduction for homes completing comprehensive duct cleaning after five or more years of neglect. Savings vary based on initial contamination severity, but restored airflow reduces compressor run times and improves heat exchange efficiency throughout your system.
How long does professional duct cleaning take?
Typically 3-5 hours for an average 2,000-square-foot home. This timeframe includes setup, negative pressure equipment deployment, agitation cleaning at each register, and post-cleaning verification. Severely contaminated systems, large homes exceeding 3,000 square feet, or homes requiring additional services like mold remediation extend this window accordingly.
Can I clean my air ducts myself effectively?
Partially accessible areas respond well to DIY methods. Homeowners successfully clear debris within 4-6 feet of register openings using shop vacuums and extension brushes. However, deep interior ductwork, flex duct systems, and contamination scenarios involving mold or pests require professional equipment and expertise that cannot be replicated with consumer-grade tools.
What does professional duct cleaning cost in Austin?
Expect $450-800 for standard whole-home duct cleaning services. Pricing varies based on home size, system complexity, contamination severity, and additional services like sanitizing treatments or UV light installation. Quotes significantly below this range often indicate bait-and-switch pricing that adds charges once technicians arrive, while substantially higher quotes should include detailed justification for premium services.