
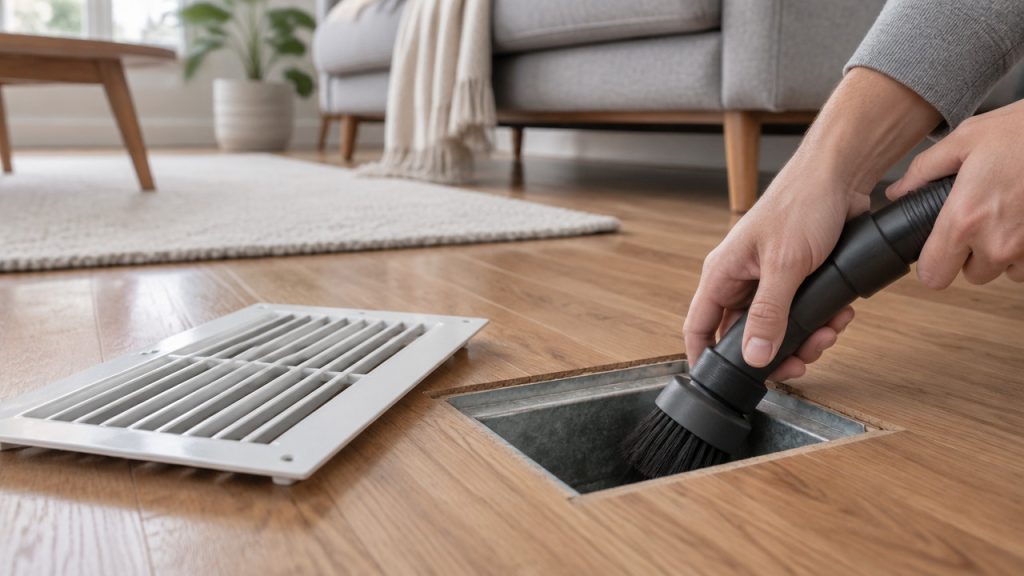
To clean your air vents, turn off your HVAC system, unscrew each register cover, wash it in warm soapy water, and vacuum the visible duct opening with a brush attachment. It takes about 20 minutes per room and removes the dust you can actually see. In Austin, where cedar pollen and fine limestone dust sneak into every home, this small ritual can mean fewer sneezes, calmer nurseries, and an HVAC system that breathes easier. Here is exactly how to do it right.
The 20-Minute Answer: Switch Off, Unscrew, Wash, Vacuum, Reinstall
If you want the shortcut on how to clean your air vents without reading a full manual, here it is. You can knock out a standard room in about 20 minutes using nothing more than a screwdriver, some dish soap, and a vacuum with a brush attachment. This routine handles the visible dust and grime that builds up on your register covers and the first inch of ductwork, giving your HVAC system a clearer path to push air and giving your lungs a bit of a break.
- Switch off your HVAC system at the thermostat to prevent dust from sucking into the blower while you work.
- Unscrew the register covers using a standard screwdriver, placing screws in a small bowl so they do not vanish into the carpet.
- Wash the metal or plastic covers in a sink with warm soapy water, scrubbing away the stuck-on film.
- Vacuum the visible duct opening gently, reaching as far as your arm or hose allows without damaging the duct lining.
- Reinstall the dry covers and tighten the screws snug, but not so tight you strip the holes.
For homeowners dealing with deeper buildup inside the system, this surface cleaning is really just maintenance. For a comprehensive guide to air duct cleaning that addresses the full length of your ductwork, you will need a different approach.
Why Austin’s Cedar Pollen and Limestone Dust Turn Vent Covers Into Allergen Magnets
Living in Central Texas means dealing with air quality challenges that most other regions simply do not face. Our local pollen seasons are aggressive, and the fine dust from limestone construction gets into everything. When your HVAC system runs, it pulls that airborne material through your return vents, and a significant amount of it gets trapped by the grime on your register covers. Every time the fan kicks on, that layer of dust can shed particles back into your airflow, triggering allergies and irritating sensitive respiratory systems.
[Analysis][2026 Data] suggests that household dust composition varies heavily by region, with local geological and botanical factors playing a major role in what settles inside our homes. In Austin, that means a heavy mix of organic particulates and mineral dust that cakes onto vents faster than in wetter climates.
This buildup is not just ugly. It impacts deep cleaning your air ducts for a healthier living space because dirty vents act as a reservoir for contaminants that bypass your filter.
- Cedar pollen: Famous in Central Texas for “cedar fever,” this fine, powdery allergen coats surfaces in winter and easily enters HVAC systems.
- Oak pollen: A spring menace that creates thick layers of yellow dust, contributing to vent grime during March and April.
- Limestone dust: Fine, gritty particulate from local construction and soil that settles deep into vent nooks.
- Pet dander: A year-round indoor allergen that clings to the sticky dust buildup on register covers.
The Step-by-Step Routine: From Register Covers to the First Foot of Duct
Alright, let’s walk through the actual process. This is the routine you can do on a Saturday morning while the coffee brews. It requires minimal tools and zero professional skills, but it does require a bit of patience. Do not rush the drying step, and definitely do not skip turning off the system. If the fan kicks on while your vent covers are off, you risk sucking debris deeper into the ductwork, which defeats the whole purpose.
- Turn off the thermostat. Flip it to “Off” or “Fan Off” so the system does not surprise you mid-clean.
- Remove the register covers. Use your screwdriver to take out the screws, keeping track of them in a safe spot.
- Soak the covers. Fill a utility sink or bucket with warm water and a few squirts of degreasing dish soap. Let them sit for ten minutes.
- Scrub the grime. Use a stiff brush or an old toothbrush to get into the louvers and slots where dust loves to hide.
- Rinse and dry thoroughly. Shake off excess water and let them air dry completely or wipe them down with a microfiber cloth.
- Vacuum the duct opening. Use a soft brush attachment to gently sweep the inside edge of the duct boot. Do not push too hard or you might damage the duct liner or sealant.
- Reinstall the registers. Screw them back into place, wiping down the surrounding wall or floor to finish the job.
This routine keeps the visible parts of your system clean and helps maintain good airflow. For a broader perspective on maintaining your whole system, check out this homeowner’s guide to effective duct cleaning to understand the bigger picture.
What Your Vacuum Can’t Reach: Vent Cleaning vs. True Duct Cleaning
There is a massive difference between wiping down your vent covers and actually cleaning your air ducts. What we have covered so far is surface maintenance. True duct cleaning involves specialized equipment that creates negative pressure inside the ductwork, pulling dust and debris out rather than just pushing it around. Your shop vac can reach maybe six inches into the boot. The main trunk lines running through your attic or crawl space? That is a different story entirely.
Professional duct cleaning involves cleaning the supply runs, return runs, the plenum, and sometimes the blower wheel and evaporator coil. These are areas you simply cannot access without specialized tools and training.
| Feature | DIY Vent Cleaning | Professional Duct Cleaning |
|---|---|---|
| Area Covered | Register covers and first 6 inches of duct | Entire duct system, plenum, and blower components |
| Tools Used | Screwdriver, vacuum, brush, dish soap | HEPA-filtered negative air machine, agitation brushes, air whips |
| Results | Cleaner grilles, removed visible surface dust | Removed deep-set debris, improved airflow, reduced indoor pollutants |
| Frequency | Every 1-3 months | Every 3-5 years or as needed |
If you are seeing constant dust blowback or uneven temps, it might be time to consider professional air duct cleaning rather than just scrubbing the registers.
Five Warning Signs Your Vents Need More Than a Wipe-Down
Sometimes a DIY cleaning is not enough. Your HVAC system gives you clues when something deeper is going on. If you spot any of these five signs, it usually points to issues deeper than the register cover. Ignoring them can lead to higher energy bills, poorer air quality, and unnecessary strain on your HVAC equipment.
- Visible dust blowback: You see a puff of dust when the system starts up, indicating debris is loose in the ductwork.
- Musty odor: A stale or moldy smell comes from the vents, often pointing to microbial growth inside the ducts or on the coil.
- Uneven airflow: Some rooms get plenty of air while others feel stuffy, suggesting a blockage or leak in the main lines.
- Mold specks: You see black or green spotting near the vent edges, which requires immediate mold remediation attention.
- Rising energy bills: Your HVAC runs longer to reach the set temperature because clogged ducts restrict airflow.
For a deeper look at what these indicators mean, reviewing the signs that your ducts need cleaning can help you decide if DIY is enough or if you need backup.
The Vent Everyone Forgets: Why Your Dryer Vent Is a Bigger Fire Risk Than Your Registers
While we are talking about vents, let’s pivot to the one that actually poses a physical danger if ignored: your dryer vent. Technically, it is not part of your HVAC air duct system, but it follows a similar logic of a tube moving air. The difference is what that tube moves. Dryer vents carry super-heated air and highly flammable lint. When that lint builds up, you are looking at a serious fire hazard.
Unlike dust on your HVAC registers, lint accumulation is actively dangerous. It restricts airflow, causes your dryer to overheat, and can ignite from the heating element. An annual cleaning is not just a suggestion; it is a safety requirement. If your clothes are taking longer to dry or the dryer feels hot to the touch, the vent is likely clogged. Address it immediately.
For a full breakdown of the process and risks, check out our essential guide to dryer vent cleaning.
When to Call a Local Pro: Babies, Allergies, Mold Odors, and Post-Renovation Dust
DIY vent cleaning is great for routine maintenance. But there are specific scenarios where you really should call in experts. If you have a baby on the way, sensitive allergies, or have just completed a home renovation, the dust in your ductwork goes beyond cosmetic. Construction dust is particularly nasty, containing fine particulates from drywall, wood, and insulation that standard filters often miss.
Noble Air serves Austin and Central Texas communities as a family-owned business. We understand local homes and the specific irritants that affect this region. Dealing with mold odors or significant buildup deserves more than a shop vac.
- New baby: Infants have underdeveloped respiratory systems; clean ducts create a healthier nursery environment.
- Severe allergies: When pollen and dust triggers are constant, deep cleaning provides relief beyond daily vacuuming.
- Mold odors: Smelling mustiness from your vents suggests growth inside the system that surface cleaning cannot fix.
- Post-renovation: Construction kicks up massive amounts of fine dust that settles in ducts, requiring professional extraction.
Our dryer vent cleaning service is also available for homeowners wanting to check that box while handling their air duct needs.
Key Takeaways: Your Air Vent Cleaning Cheat Sheet
To wrap things up, here is your quick reference for maintaining clean air vents and knowing when to seek help. Stick to this schedule and you will keep your system running smoother and your indoor air cleaner.
- Frequency: Clean register covers every 3 months; inspect full ductwork yearly.
- DIY limits: You can clean vents, but duct interiors require professional negative-pressure equipment.
- Austin factors: Cedar pollen and limestone dust accelerate buildup, demanding vigilance.
- Safety first: Dryer vents need annual cleaning to prevent fire hazards from lint buildup.
- Call a pro: Discern signs like mold, dust blowback, or post-renovation debris as triggers.
FAQ: Straight Answers on Cleaning Air Vents at Home
How often should I clean my air vent covers?
Every three months. Quarterly cleaning prevents dust from caking onto the louvers. If you have shedding pets or live near a busy road, you might bump that to every two months to keep up with the extra particulate load.
Can I use vinegar to clean air vent covers?
Yes, but dilute it. A 50/50 mix of white vinegar and water helps cut through sticky residue and mildew. Avoid using straight vinegar on painted or coated covers, as the acidity can sometimes dull the finish over time.
Do I need a special vacuum attachment for vent cleaning?
No, a standard brush attachment works. The key is using a soft bristle that dislodges dust without scratching the duct boot. A crevice tool can help you reach corners, but avoid jamming it deep into the ductwork.
What does mold around my air vents look like?
Black or green specks near the grilles. It often appears as a spotted or fuzzy growth on the register or the surrounding drywall. If you see this, do not scrub it yourself, as it can spread spores deeper into the system.
How much does professional duct cleaning cost?
It varies by home size. Professional cleaning depends on the number of vents, the system complexity, and accessibility of the ductwork. It is an investment in air quality that typically pays off in comfort and efficiency. For more details on identifying when you need it, see our guide on the top signs your air ducts need cleaning.