
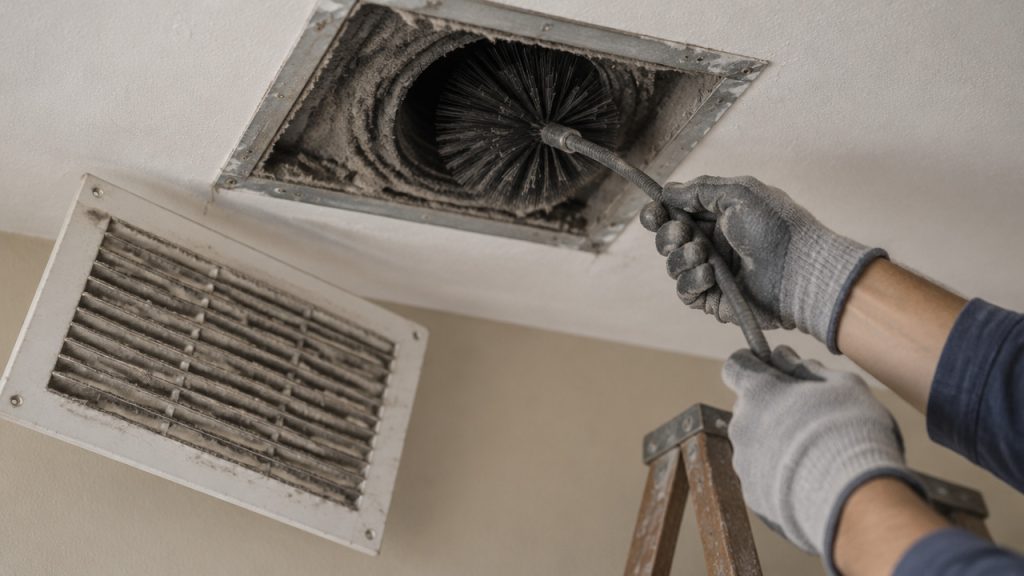
Yes, you can clean parts of your air ducts yourself, but not the whole system. A vacuum and a screwdriver will handle vent covers, registers, and the first few inches of ductwork. They will not reach the trunk lines, coil, or blower where most contamination lives. In 2026, Austin homes face cedar pollen, summer humidity, and constant HVAC run time, so a half-finished DIY job can stir up more dust than it removes. Here is what is safe to tackle and where a pro earns the fee.
Quick Answer: DIY Reaches About 10% of Your Duct System, and the Other 90% Is the Problem
You can absolutely handle surface-level cleaning on vents and registers, but the deep ductwork requires professional negative-pressure equipment. The choice to clean your air ducts yourself or hire a professional in Austin comes down to understanding where the dust actually hides and what tools can reach it without causing damage.
- DIY-Safe Zones: Vent covers, return grilles, filter slots, and the first 3-6 inches of visible ductwork.
- Pro-Only Zones: Main trunk lines, supply plenum, evaporator coil, blower motor, and deep flex duct runs.
- Why DIY Stops Short: Household vacuums lack the suction and reach to pull debris from 20+ feet of lined ductwork.
- The Hidden 90%: Contaminants settle deep in the system where only truck-mounted or portable HEPA vacuums can extract them.
The Five Jobs a Homeowner Can Actually Finish Without Calling Anyone
Before you decide can I do duct cleaning myself, let’s look at what you can realistically accomplish with standard household tools. These tasks make a visible difference in your home’s cleanliness and improve your indoor air quality without risking damage to your HVAC system.
- Clean Register Covers: Remove with a screwdriver, wash in the sink with warm soapy water, and dry completely before reinstalling. Do this every 6-12 months or when visibly dusty.
- Vacuum Return Grilles: Use a brush attachment to remove dust buildup from return air intakes, which capture large debris before it enters the system. Monthly works well for most homes.
- Swap Air Filters: Replace your HVAC filter with a MERV-rated filter appropriate for your system. Mark the date on the filter frame and check it every 30-90 days depending on pets and allergies.
- Wipe Visible Vent Interiors: Extend a microfiber duster or damp cloth 3-6 inches into the vent boot to capture dust you can actually see. Do this during your regular deep cleaning routine.
- Clear Floor-Level Dust: For floor registers, remove the grate and use a crevice tool to vacuum dust bunnies that collect in the boot area. Check these quarterly or more often with shedding pets.
Why a Shop Vac and a Broom Handle Cannot Match Negative-Pressure Duct Extraction
Professional duct cleaning equipment operates on a completely different principle than anything you can rent at a hardware store. Truck-mounted vacuum systems pull 10,000+ cubic feet of air per minute, creating negative pressure that suctions debris from the entire duct network simultaneously. Portable HEPA-filtered units used by certified technicians still generate far more extraction power than a shop vac while containing the particles they remove.
The real challenge isn’t just suction. It’s agitation. Professionals use air whips, rotary brushes, and compressed air nozzles to dislodge sticky dust from duct walls while the vacuum captures it. A broom handle with a rag taped to the end might move some dust around, but it cannot replicate that combination of mechanical agitation and continuous extraction. Understanding DIY vs professional air duct cleaning means recognizing that equipment gap.
| Tool Type | Reach | Containment | Damage Risk |
|---|---|---|---|
| Shop Vac + Attachments | 3-6 feet | None (blows dust back) | Low if careful |
| Rental Duct Kit | 10-15 feet | Poor (no HEPA seal) | Moderate (flex duct tear risk) |
| Pro Portable HEPA | Entire system | Full (HEPA filtration) | Low (trained operator) |
| Truck-Mounted Vacuum | Entire system | Complete (sealed system) | Lowest (professional-grade) |
DIY attempts at deep cleaning carry real risks. Aggressive poking with homemade tools can tear flex duct lining, which creates air leaks and forces your system to run longer. Disturbing the mastic seal at duct joints without properly resealing them introduces air gaps that waste energy. And without proper containment, you might redistribute dust and allergens throughout your home instead of removing them.
Attempting to clean beyond visible areas with improper tools can damage duct sealing materials and create air leaks that reduce system efficiency by 20% or more, according to HVAC efficiency research.
Austin’s Cedar Pollen, Humidity, and Attic Ducts Change the DIY Math
Central Texas homeowners face a unique combination of environmental factors that make partial duct cleaning less effective. The infamous cedar fever season dumps massive amounts of pollen into the air each winter. That pollen settles inside ductwork, on coils, and in the blower assembly where DIY methods cannot reach. When your system kicks on, that allergen load circulates straight to your family.
Summer in Austin means air conditioning runs almost continuously. Attic temperatures climb well above 130°F, and the temperature difference between that hot attic air and your cooled living space creates condensation inside ductwork. That moisture, combined with the dust already present, creates ideal conditions for mold growth on duct interiors and especially on the evaporator coil.
- Cedar Pollen Load: Austin’s mountain cedar releases pollen counts that rank among the highest in the country, filling ducts with allergens each winter.
- Condensation Risk: Temperature differentials in attic duct runs create moisture that traps dust and enables mold growth.
- Extended Run Times: Austin homes run HVAC 8-10 months per year, circulating more air and depositing more debris than in milder climates.
- Baby Room Concerns: Nurseries and children’s rooms need cleaner air than DIY surface cleaning can provide for developing respiratory systems.
Families exploring the health benefits of having your air ducts cleaned often notice the difference during peak allergy seasons. When cedar pollen counts spike in January, or when mold spores multiply during humid summer months, the air quality inside your ductwork directly affects how your family breathes at home.
How to Clean Your Vents and Registers Safely in 7 Steps (Without Spreading Dust Room to Room)
This homeowner’s guide to effective duct cleaning focuses on what you can do safely. Follow these steps every 3-6 months to keep your vents clean and your system running efficiently without risking damage to your ductwork.
- Turn Off Your HVAC System: Flip the thermostat to “Off” so the blower doesn’t kick on while you’re working. This prevents dust from being pulled deeper into the system or blown back into your living space.
- Remove Register Covers: Unscrew each vent cover carefully and set the screws aside in a small bowl. Place the covers on a towel or directly into your sink for washing.
- Vacuum the Vent Boot: Use a hose with a brush attachment to vacuum the visible interior of the vent boot. Work slowly and avoid pushing your vacuum head deeper than 6 inches into the duct.
- Wipe Down Surfaces: Dampen a microfiber cloth with a mild cleaning solution and wipe the interior walls of the vent boot that you can reach. Dry immediately with a second cloth.
- Clean and Dry Register Covers: Wash the removed covers in warm soapy water, rinse thoroughly, and dry completely with a clean towel before reinstalling.
- Replace Your Air Filter: This is the perfect time to swap in a fresh filter. Choose a MERV rating appropriate for your system. Higher isn’t always better if it restricts airflow.
- Reinstall Covers and Restore Power: Screw the vent covers back in place, return your thermostat to its previous setting, and enjoy breathing cleaner air.
Never insert vacuum attachments or cleaning tools beyond arm’s length into any ductwork. Deep cleaning requires professional equipment that creates sealed negative pressure, preventing the redistribution of dust and potential mold spores throughout your home.
Five Red Flags That Mean Stop the DIY and Book a Certified Technician
Some duct issues go beyond dust buildup. When you spot these warning signs, DIY cleaning won’t solve the underlying problem and might make things worse. Recognizing the signs your air ducts need cleaning helps you know when professional intervention protects both your home and your health.
| Symptom | Likely Cause | DIY or Pro? |
|---|---|---|
| Visible mold growth | Moisture in ducts or on coil | Pro required |
| Musty odor from vents | Mold, bacteria, or pest contamination | Pro required |
| Pest droppings or debris | Rodents or insects in ductwork | Pro required |
| Heavy dust after remodel | Construction debris in system | Pro recommended |
| Persistent allergy symptoms | Allergens circulating from ducts | Pro recommended |
Technicians certified by NADCA (National Air Duct Cleaners Association) follow established standards for source removal and containment. They also have access to additional services like UV light HVAC disinfection, which kills mold and bacteria on the coil and in the air stream. These specialized treatments address problems that simple vacuuming cannot touch.
Key Takeaways: What to Do This Weekend and What to Hand Off
The question of air duct cleaning’s impact on indoor air quality really comes down to doing what you can well and hiring experts for what you cannot. DIY vent cleaning makes a visible difference and maintains your system between professional visits. But it cannot reach the contamination that affects your air quality most.
- You can clean: Vent covers, return grilles, visible duct openings, and your air filter.
- You cannot clean: Trunk lines, supply plenum, evaporator coil, blower assembly, and deep flex duct.
- DIY tools work for surfaces: A shop vac and screwdriver handle the 10% you can see and reach.
- Professional tools clean the system: Negative-pressure equipment extracts the 90% of contamination hidden deep in ductwork.
- Damage costs more than service: Torn flex duct and disturbed seals lead to higher energy bills and poor system performance.
For Austin homeowners ready to address that hidden 90%, Noble Air brings the equipment and expertise to do the job right the first time.
FAQ: Straight Answers on DIY Duct Cleaning
How much does professional duct cleaning cost compared to doing it myself?
Professional service costs more upfront but covers the entire system. DIY cleaning costs only your time and basic supplies. The trade-off is that professional cleaning reaches 100% of your ductwork versus the 10% accessible to homeowners.
How often should I clean my air ducts?
Every 3-5 years for most homes. Homes with pets, allergies, or recent renovations may benefit from more frequent cleaning. DIY vent cleaning can happen every 3-6 months to maintain cleanliness between professional visits.
Can I remove mold from my air ducts myself?
No, mold in ductwork requires professional remediation. Mold indicates a moisture problem that DIY cleaning cannot address. Certified technicians use containment protocols and antimicrobial treatments that prevent spore spread during removal.
Is cleaning dryer vents a DIY-friendly task?
Partial DIY is possible with the right flexible brush kit. You can clean the accessible lint trap and vent hood exit. For longer runs or suspect blockages, professional dryer vent cleaning ensures the entire path to the exterior stays clear.
Do rental duct cleaning kits work as well as professional service?
Rental kits lack the power and containment of professional equipment. They may reach farther than a household vacuum, but their lower suction and poor HEPA filtration mean minimal actual debris removal. You also risk damaging ductwork without proper training.
Understanding what you need to know about DIY vs professional duct cleaning helps you make smart choices for your home and your budget. Some tasks fit perfectly into a Saturday morning routine. Others need the truck-mounted vacuum and trained eye that only a dedicated professional can provide.