
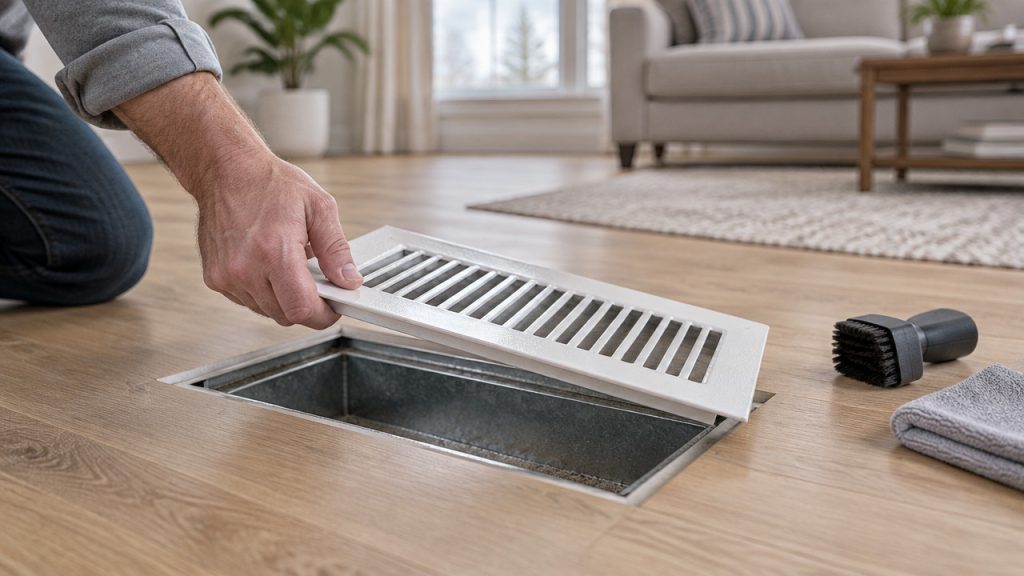
To clean air vents in your home, remove the vent covers, vacuum and wipe the openings, and reach a short way into the duct with a vacuum hose. That takes care of the household dust and allergens you can see on vent covers and registers, but it stops at arm’s length, and the dust settled deeper in the ductwork stays put. For Austin-area homes with allergy sufferers or a baby in the nursery, that gap matters, so how often you clean and which warning signs you notice (heavy dust returning fast, musty smells, visible debris) tell you a lot. The decision is whether a thorough DIY pass is enough for your home or whether those signs point to the ducts themselves.
What Is the Fastest Way to Clean Air Vents at Home?
Surface grime comes off with a vacuum and a damp cloth, but that approach only clears what sits on the register itself.
- Vent covers and registers come off easily and wash clean with warm, soapy water in a sink or utility tub.
- Visible duct openings respond well to a vacuum hose with a brush attachment for dust lodged just inside the vent.
- Deep ductwork stays out of reach for DIY tools, since standard vacuums lose suction past the first few feet of line.
- HVAC supply vents in ceilings or high walls often need a sturdy step ladder for safe, effective access during cleaning.
- Return air vents pull in the most household dust, so they deserve first attention during any routine cleaning session.
Homeowners can handle vent covers and the first few inches of duct opening without trouble, but deep grime needs professional air duct cleaning equipment to reach. Those tools mount on a truck and generate enough suction to pull dust from the entire line, not just the opening. DIY cleaning keeps surfaces tidy, but full ductwork needs a different grade of equipment.
What Do You Need Before You Start Cleaning Your Vents?
A few basic household tools make the job quicker, tidier and safer for both the cleaner and the home. The right prep keeps dust from drifting into living spaces and protects floors and furniture during the process. Before grabbing any tools, turn off the HVAC system at the thermostat so the fan does not kick on mid-clean. That fan would pull loose dust straight into the system or blow it back into the room, undoing the work.
Gathering supplies ahead of time saves trips back and forth, and keeps the workflow smooth from start to finish.
- Screwdriver (flathead or Phillips, depending on your register screws) for removing vent covers from walls, floors or ceilings.
- Vacuum with brush attachment and a hose long enough to reach into the vent opening several inches.
- Bucket of warm, soapy water and microfiber cloths or a soft brush for washing vent covers and registers.
- Drop cloth or old towels to place under the work area and catch dust, debris or drips.
- Step ladder for reaching high vents safely, with a spotter if the ladder feels unsteady.
- Protective gear like a dust mask and safety glasses for anyone sensitive to household dust and allergens.
This prep routine sets up a clean workspace and protects the home. For a broader look at maintaining home air systems, this homeowner’s guide to effective duct cleaning covers the full scope of what to expect.
How to Clean Air Vents Step by Step
A methodical approach keeps dust from settling right back into the room or the HVAC system. Working in order remove, vacuum, wash, dry and reinstall makes sure each vent gets fully clean before it goes back in place. Rushing or skipping the drying step can trap moisture and lead to new problems.
- Turn off the HVAC system at the thermostat so the fan does not activate while the vent covers are off.
- Remove vent covers and registers by unscrewing them from the wall, floor or ceiling, keeping screws in a small dish so they do not get lost.
- Vacuum inside the duct opening using the hose and brush attachment, reaching as far as the arm comfortably allows without forcing it.
- Wipe the visible duct interior with a damp microfiber cloth to capture fine dust the vacuum may have missed near the opening.
- Soak vent covers in warm, soapy water for several minutes to loosen grime, then scrub gently with a soft brush and rinse clean.
- Dry vent covers thoroughly with a clean towel or air dry them completely to prevent moisture from entering the ductwork.
- Reinstall vent covers and turn the HVAC back on, checking that air flows freely through each cleaned register.
This process handles what a homeowner can safely reach. Surface cleaning keeps dust from blowing into rooms, but it does not clear the full length of the ductwork. When homes show signs of deeper buildup, deep cleaning your air ducts requires professional equipment that reaches beyond what a household vacuum can touch.
How Often Should You Clean Vents, and What Are the Warning Signs?
Vents collect dust steadily over time, and routine cleaning keeps that accumulation from becoming a bigger issue. A light cleaning every few months especially before and after peak heating and cooling seasons keeps airflow steady and indoor air fresher. Homes with pets, allergy sufferers or young children often benefit from more frequent attention than the average household.
Watching for warning signs helps homeowners decide when surface cleaning is enough and when the ducts themselves need a closer look.
- Dust streaks appearing quickly around vent edges after a recent cleaning signal that the duct interior is shedding debris faster than normal.
- Musty or stale smells coming from the vents when the HVAC system kicks on often point to mold growth or trapped moisture in the ductwork.
- Visible mold growth on or near vent covers suggests a moisture problem that goes deeper than the surface.
- Weak airflow from supply vents, even with the fan on high, can signal a blockage or heavy buildup inside the line.
- Recent home renovation work that created fine dust (drywall sanding, sawing) often leaves debris deep in the vents that DIY cleaning cannot fully reach.
Recognizing these signs your ducts need cleaning helps Austin homeowners decide when to handle vents themselves and when to call in a professional for a deeper inspection.
When Should You Call a Professional Instead of Going DIY?
Surface cleaning handles what homeowners can see, but the ductwork itself can hide dust, debris and mold that no household tool can reach. Professional duct cleaning trucks use high-powered vacuums and agitation brushes designed to travel the full length of the line. That equipment pulls contaminants out rather than pushing them deeper or stirring them into the home’s air.
Certain signs tell homeowners that the problem has moved past the vent cover and into the ductwork itself. Visible mold, evidence of pests, heavy dust buildup that returns quickly, or musty odors that do not go away all point to issues deeper in the system. In those cases, professional inspection and cleaning protect both the home’s air quality and the HVAC system’s efficiency.
Local Austin-area homeowners often notice these issues more during the humid summer months, when moisture in the air can encourage mold growth inside ducts. A professional assessment identifies the source and scope of the problem.
Comparing the two approaches makes the distinction clear:
| Scope | DIY Vent Cleaning | Professional Duct Cleaning |
|---|---|---|
| Reach | Vent covers and first few inches of duct opening | Full length of ductwork from unit to register |
| Tools | Household vacuum, screwdriver, soapy water, cloths | Truck-mounted vacuum, agitation brushes, inspection cameras |
| Best Use | Routine dust maintenance, visible grime on registers | Deep buildup, mold concerns, post-renovation cleanup, pest evidence |
| Time Needed | 15–30 minutes per vent | 2–4 hours for full home |
| Frequency | Every 3–6 months or as needed | Every 3–5 years or when warning signs appear |
Honest comparison helps homeowners decide the right level of service. Understanding the health benefits of cleaned air ducts shows why professional service matters when warning signs appear, especially for families with allergies or young children.
Frequently Asked Questions About Cleaning Home Air Vents
Can I clean air vents without removing the covers?
Yes, but the results are limited. Wiping the surface of a vent cover removes visible dust, but it does not clean the edges, the back of the grille, or the dust sitting just inside the duct opening. Removing the cover takes only a minute or two and allows for a more effective clean.
Is it safe to use a vacuum on return air vents?
Yes, with the HVAC system turned off. A vacuum with a brush attachment clears dust from the vent opening safely, but never insert the hose deep into the ductwork, where it could damage components or get stuck. Return air vents pull the most dust through the system, so routine vacuuming keeps them clear.
Are dryer vents cleaned the same way as HVAC vents?
No, dryer vents require a different process. Dryer vents collect lint rather than household dust, and lint buildup creates a fire hazard that needs a specialized brush and rod system. Our dryer vent cleaning guide covers that process in detail, while HVAC vents focus on dust and allergen removal.
What should I do if I find mold on or inside a vent?
Stop and call a professional. Mold on a vent cover can sometimes be cleaned with a proper solution, but mold inside the ductwork points to a moisture problem that DIY methods cannot solve. Scrubbing surface mold without addressing the source often leads to regrowth.
Do I need to clean vents after a home renovation?
Yes, renovation dust settles deep in ductwork. Fine particles from drywall, sawing or sanding travel through the HVAC system and lodge in vents and ducts. DIY cleaning handles the registers, but full duct cleaning removes the debris that construction leaves behind.
Can dirty vents make allergy symptoms worse for babies?
Yes, dirty vents circulate allergens through the home. Dust, pollen and pet dander trapped in vents blow into rooms every time the HVAC system runs. For families with infants or allergy sufferers, clean vents and ducts help reduce irritants in the air.